

After we started last year in a post with the setup and initial thoughts about the Landing Zone Accelerator (LZA), this post is about deploying the standard solution and making first practical steps
This means
We will tackle those in a later blog post.
Deployment
Now, let’s face the deployment, and we want to give you some hints and tips.
with ControlTower
In our case, we used the awscdk-rootmail construct to bundle all EMails related to AWS accounts in the organization within the Management Accounts. This construct was already part of a past blog post. Feel free to read more.
Here is the snipped we deployed as part of a separate bootstrap cdk stack, before the rollout of ControlTower (CT) was started:
import { Rootmail } from '@mavogel/awscdk-rootmail';
import {
  App,
  Stack,
  StackProps,
  aws_route53 as r53,
} from 'aws-cdk-lib';
import { Construct } from 'constructs';

export class BoostrapStack extends Stack {
  constructor(scope: Construct, id: string, props: StackProps = {}) {
    super(scope, id, props);

    const domain = 'mycompany.test'

    const hostedZone = r53.HostedZone.fromLookup(this, 'rootmail-parent-hosted-zone', {
      domainName: domain,
    });

    new Rootmail(this, 'rootmail', {
      // 1. a domain you own, registered via Route53 in the SAME account
      domain: domain,
      // 2. so the subdomain will be aws.mycompany.test and
      subdomain: 'aws',
      // wired / delegated  automatically
      wireDNSToHostedZoneID: hostedZone.hostedZoneId,
    });
  }
}
We need the email addresses as part of the CT setup for the Audit and Log Archive accounts. You can find the steps here for rolling out CT. Step 1 describes exactly how to use the email addresses from the root mail construct mentioned above.
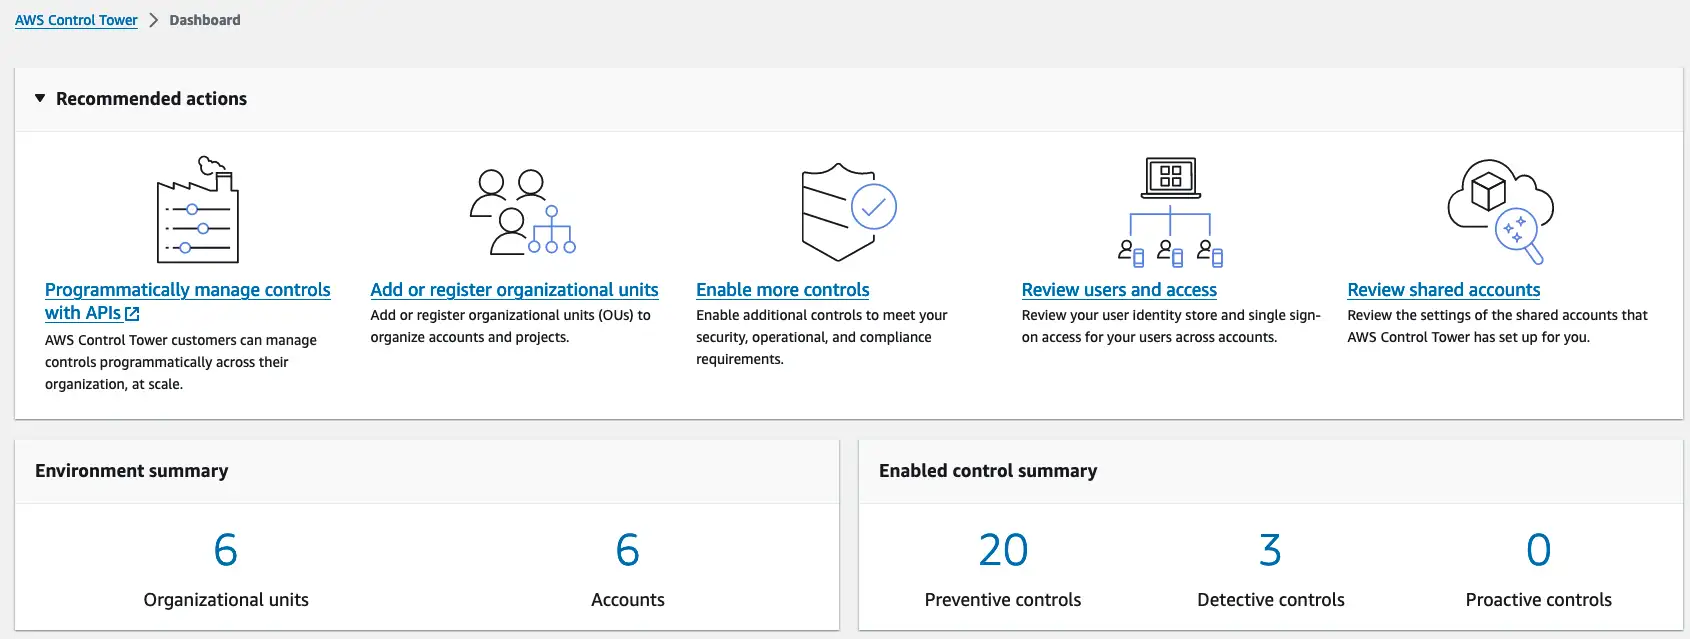
Now that we have a fully rolled-out CT and the LandingZone, we deploy the LZA on top of this.
Rolling out the LZA
Now let’s rollout the LZA, which with a few bumps, which we’ll described in the following section, is straightforward.
From the releases page choose the desired version. In our case v1.6.2. You can then create a cloudformation stack in the region you rolled our CT before with the template url following the pattern.
The steps are described here.
Or you can use the command line (more details here) as follows:
aws cloudformation create-stack --stack-name AWSAccelerator-InstallerStack --template-url https://s3.amazonaws.com/solutions-reference/landing-zone-accelerator-on-aws/v1.6.2/AWSAccelerator-InstallerStack.template \
--parameters ParameterKey=RepositoryName,ParameterValue=<Repository_Name> \
ParameterKey=RepositoryBranchName,ParameterValue=<Branch_Name> \
ParameterKey=ManagementAccountEmail,ParameterValue=<Management_Email> \
ParameterKey=LogArchiveAccountEmail,ParameterValue=<LogArchive_Email> \
ParameterKey=AuditAccountEmail,ParameterValue=<Audit_Email> \
ParameterKey=EnableApprovalStage,ParameterValue=Yes \
ParameterKey=ApprovalStageNotifyEmailList,ParameterValue=<Comma_Delimited_Notify_Emails> \
ParameterKey=ControlTowerEnabled,ParameterValue=Yes \
--capabilities CAPABILITY_IAM
When rolling out the LZA, the following error is not a surprise if you’re having a brownfield setup.
AWSAccelerator-PrepareStack-123456789012-eu-central-1 | 10:32:02 AM | CREATE_FAILED | Custom::ValidateEnvironmentConfiguration | ValidateEnvironmentConfig/ValidateEnvironmentResource/Default (ValidateEnvironmentConfigValidateEnvironmentResourceD10DC179) Received response status [FAILED] from custom resource. Message returned: Organizational Unit 'Sandbox' with id of 'ou-1b2c-xyzxyzn' was not found in the organization configuration.,Organizational Unit 'Suspended' with id of 'ou-1b2c-xyzxyzm' was not found in the organization configuration.
It means that there are OUs which are not known to the LZA yet. As the config repo is GitOps style, meaning the truth is in the code, it is solved as follows by adding the respective OUs to the organization-config.yaml:
enable: true
organizationalUnits:
  - name: Security
  - name: Infrastructure
  - name: Sandbox   # <- added here
  - name: Suspended # <- added here
    ignore: true    # <- added here
serviceControlPolicies: []
taggingPolicies: []
backupPolicies: []
As you can see, you can also ignore certain OUs, for example, if there is one for suspended accounts. More details can be found here.
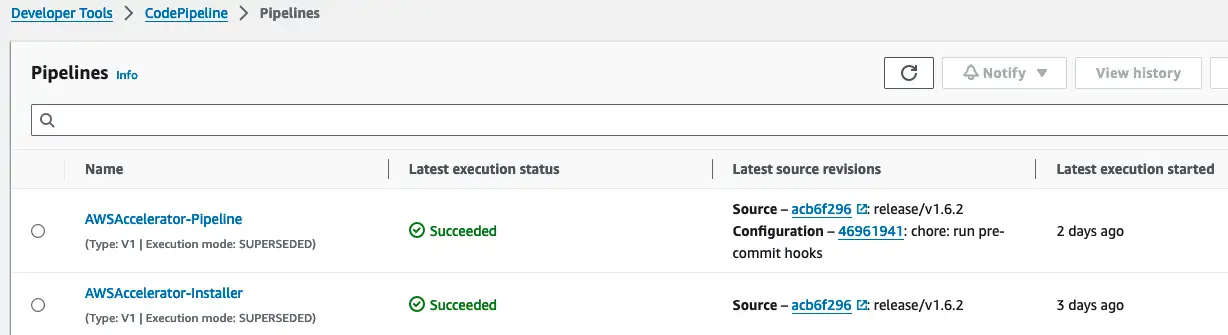
Push the changes to the config repo and retrigger the AWSAccelerator-Pipeline.
Now that we have the initial setup up and running and the pipeline is successful, we adapt the config to best practices 🎉
Adapted config
The LZA provides multiple sample configurations here 👈
In our case, we recommend to use the lza-sample-config with slight adaptions which we will point out now:
For the network-config.yaml, we remove all configurations, e.g., the Transit Gateway (TGW) to keep the costs lower for now
homeRegion: &HOME_REGION eu-central-1
defaultVpc:
  delete: true
  excludeAccounts: []
transitGateways: []
endpointPolicies: []
vpcs: []
On the costs page is is about 40% of the total costs. However, we can always add it later on.
For the security-config.yaml we use all services, except the NIST Special Publication.
centralSecurityServices:
  # omitted for brevity
  # ...
  securityHub:
    enable: true
    regionAggregation: true
    excludeRegions: []
    standards:
      - name: AWS Foundational Security Best Practices v1.0.0
        # https://docs.aws.amazon.com/securityhub/latest/userguide/securityhub-standards-fsbp-controls.html
        enable: true
      - name: CIS AWS Foundations Benchmark v1.4.0
        # https://docs.aws.amazon.com/securityhub/latest/userguide/securityhub-cis-controls.html
        enable: true
      - name: NIST Special Publication 800-53 Revision 5
        # https://docs.aws.amazon.com/securityhub/latest/userguide/nist-standard.html
        enable: false # <- disabled for now
We find defining so many configurations centrally, such as password policies very useful. Beforehand, in previous setups for clients, we had to do them manually in the IAM section of the console
iamPasswordPolicy:
  allowUsersToChangePassword: true
  hardExpiry: false
  requireUppercaseCharacters: true
  requireLowercaseCharacters: true
  requireSymbols: true
  requireNumbers: true
  minimumPasswordLength: 14
  passwordReusePrevention: 24
  maxPasswordAge: 90
Again, after the changes are made, push to the repository and trigger the pipeline.
After the setup is complete, we want to point to several useful command-line helpers to detect errors earlier in the workflow.
Validate before push
We have prepared useful commands you can use within the development and change process before you commit.
pre-commit
The tool pre-commit is A framework for managing and maintaining multi-language pre-commit hooks, which help you detect and correct errors before commiting in git.
We recommend creating a file .pre-commit-config.yaml with the following content:
repos:
  - repo: https://github.com/pre-commit/pre-commit-hooks
    rev: v4.5.0
    hooks:
      - id: check-json # <- for the policies
      - id: end-of-file-fixer
      - id: trailing-whitespace
  - repo: https://github.com/commitizen-tools/commitizen
    rev: v3.21.3
    hooks:
      - id: commitizen # <- to ensure you commit messages are in the desired format
  - repo: https://github.com/adrienverge/yamllint
    rev: v1.35.1
    hooks:
      - id: yamllint   # <- lint the yaml config files. Very handy
Install the tool and the hooks. We already described the flow in a previous blog post:
brew install pre-commit
# install the hook
pre-commit install --hook-type commit-msg
# run the checks manually
pre-commit run -a
Which will, in case of nor error, give you the following output
$ pre-commit run -a
check json...............................................................Passed
fix end of files.........................................................Passed
trim trailing whitespace.................................................Passed
yamllint.................................................................Passed
This comes handy, however what about semantic validation? Such as, is the config itself correct. This we will explain now.
Manual config validation
To semantically validate your configuration changes, you need to clone the actual LZA repository and have it on the same level as the configuration repository.
git clone git@github.com:awslabs/landing-zone-accelerator-on-aws.git

tree -L 1
.
├── aws-accelerator-config
├── landing-zone-accelerator-on-aws
What does validate step do?. We do it before we push
cd landing-zone-accelerator-on-aws/source
# to use the version which you actually deployed before
git checkout v1.6.2
cd source
yarn install
yarn validate-config ../../aws-accelerator-config/
This command is also run in the pipeline, so you can already run this command earlier in the flow to save time and money, as the codepipeline does not have to run to detect the errors:
yarn validate-config ../../aws-accelerator-config/
yarn run v1.22.22
$ ts-node ./packages/@aws-accelerator/accelerator/lib/config-validator.ts ../../aws-accelerator-config/
2024-04-04 09:38:36.232 | info | replacements-config | Loading replacements config substitution values
2024-04-04 09:38:36.245 | info | config-validator | Config source directory -  ../../aws-accelerator-config/
2024-04-04 09:38:36.246 | info | replacements-config | Loading replacements config substitution values
2024-04-04 09:38:36.248 | info | replacements-config | Loading replacements config substitution values
2024-04-04 09:38:36.249 | info | replacements-config | Loading replacements config substitution values
2024-04-04 09:38:36.255 | info | accounts-config-validator | accounts-config.yaml file validation started
2024-04-04 09:38:36.256 | info | global-config-validator | global-config.yaml file validation started
2024-04-04 09:38:36.256 | info | global-config-validator | email count: 1
2024-04-04 09:38:36.257 | info | iam-config-validator | iam-config.yaml file validation started
2024-04-04 09:38:36.258 | info | network-config-validator | network-config.yaml file validation started
2024-04-04 09:38:36.259 | info | organization-config-validator | organization-config.yaml file validation started
2024-04-04 09:38:36.259 | info | security-config-validator | security-config.yaml file validation started
2024-04-04 09:38:36.261 | info | config-validator | Config file validation successful.
Great 🎉 Now let’s enroll some old accounts into CT and the LZA.
Enrolling old accounts
When you have a brownfield setup as we did, you want to enroll your old accounts. Using CT, this comes in 2 steps
- enroll via ControlTower first as described here
- add to LZA config as described here with the following config adaption in the
accounts-config.yamlfile:
# omitted for brevity
workloadAccounts:
  - name: Production
    description: The Production account
    email: root+prod-random-123@aws.mycompany.test # <- using rootmail :)
    organizationalUnit: Production
When an AWS account already exists with the given email address it is simply added. However, if NOT, then the LZA creates the new AWS account in the given OU via CT!
As you can see there are the options:
- use rootmail feature, if desired. Using
awssubdomain, e.g.:root+alias@aws.mycompany.com - if not, make advantage of the EMail alias, e.g.:
root+alias@mycompany.com
For more administrative tasks, take a look here 👈
Navigating through multiple accounts
As part of the setup we now have multiple AWS accounts, we can totally recommend the tool granted 👉 https://github.com/common-fate/granted
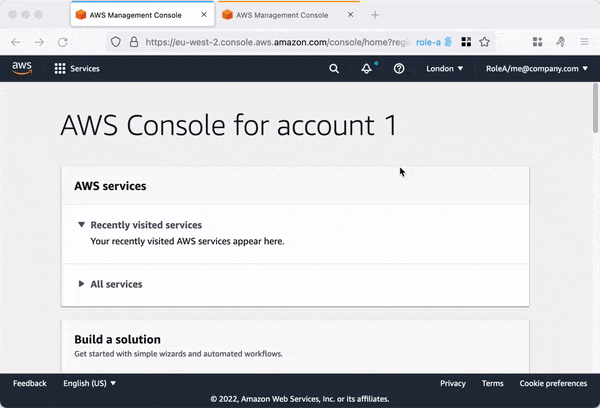
It uses the Firefox browser and the container plugin under the hood, allowing you to have multiple AWS account consoles in different tabs with different colors, making them easy to differentiate.
Conclusion
In this post we walked through first steps and recommendations, together with practical tips & tools for the LZA with CT. Are more in-depth guide can be found here 👉 Landing Zone Accelerator In Action from Kadir Keles.
The cost structure (details here) will follow, when the setup ran for 1-2 months. As also SecurityHub and GuardDuty free for 30 days and then will add another 10% to the costs. As mentioned before, we decided against a TGW setup to safe 40% of the costs.
Stay tuned for more posts later about customizing the solution 🎉


